Ever needed to label something – a jar of homemade jam, a storage bin overflowing with winter sweaters, or even just a cable behind your TV – but realized you don't have a label maker handy? Don't despair! You don't need fancy gadgets to create organized and attractive labels.
It's frustrating when you're in the middle of a project and realize you're missing a key tool. You rummage through drawers, search online, and consider running to the store, all for something that seems so simple. The time you spend searching could be spent finishing the task at hand. Plus, the cost of specialized equipment can be a barrier to simple organization.
This guide will walk you through several easy and creative methods for making labels without a label maker. We’ll explore options using everyday items you probably already have at home, from paper and scissors to printable templates and even handwritten charm.
From utilizing household items like paper and markers to leveraging the power of your computer and printer, there are numerous ways to create effective and personalized labels. We've covered various techniques, from the simplest handwritten labels to more sophisticated printable options, ensuring you can find a solution that suits your needs and resources. Now, get ready to say goodbye to unlabeled chaos!
Exploring Handwritten Labels
Handwritten labels hold a certain charm, don't they? They're personal, unique, and undeniably human. I remember when I first started organizing my spice rack. I didn't have a label maker, and honestly, the thought of buying one seemed excessive. So, I grabbed some masking tape, a Sharpie, and started labeling. The result wasn't perfect – my handwriting is a bit... enthusiastic – but it was effective, and each little label held a bit of my personality.
While handwritten labels might not be ideal for every situation (think perfectly uniform office files), they're fantastic for adding a touch of character to homemade goods, personal projects, or even just quick and temporary organization. Think about labeling jars of homemade pickles with your name and the year, or adding a cute little drawing to a child's toy bin. The possibilities are endless! To elevate your handwritten labels, consider using different colored pens, calligraphy markers, or even adding small decorative elements like washi tape borders or hand-drawn illustrations. The key is to embrace the imperfections and let your creativity shine. Experiment with different handwriting styles, font sizes, and placement on the label to achieve the desired aesthetic. A simple handwritten "Basil" on a mason jar filled with freshly dried herbs is far more inviting than a sterile, machine-printed label.
Utilizing Printable Templates
Printable label templates offer a middle ground between handwritten charm and the sleek precision of a label maker. They provide a digital framework that you can customize with your own text, fonts, colors, and even images, and then print onto adhesive paper or regular paper that you can then glue or tape onto your items. The beauty of printable templates lies in their versatility. There are countless free templates available online, catering to a wide range of needs and styles.
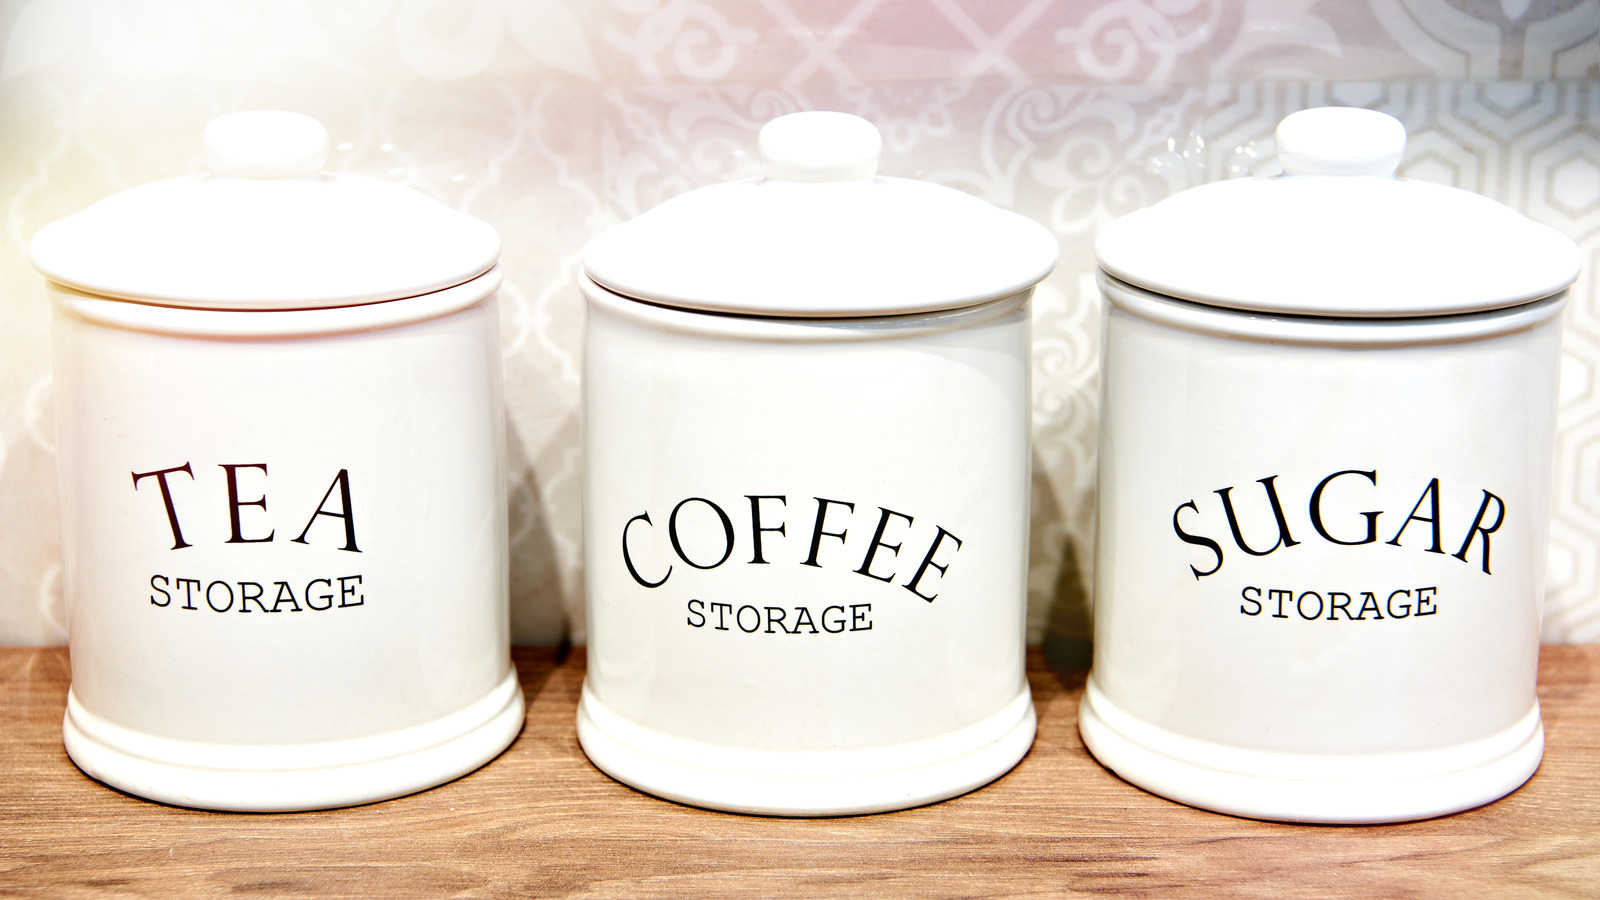
Think about creating personalized address labels for holiday cards, organizing your pantry with stylish and uniform labels, or even designing custom labels for homemade gifts. Using software like Microsoft Word, Google Docs, or dedicated graphic design programs like Canva, you can easily edit the text, adjust the font size and style, add your own images or logos, and even change the colors to match your brand or personal aesthetic. When printing, be sure to use the correct paper type for your printer and application. Adhesive label paper is ideal for a professional, peel-and-stick finish, while regular paper can be used with glue or tape for a more budget-friendly option. To ensure a clean and crisp print, check your printer settings and adjust the resolution and paper type accordingly. With a little creativity and attention to detail, printable templates can help you create labels that are both functional and visually appealing, adding a touch of professionalism and personalization to your organization efforts.
The History and Myth of Labeling
The desire to label and categorize is deeply ingrained in human nature. From the earliest cave paintings depicting animals and hunting scenes to the meticulously labeled shelves of ancient libraries, we have always sought to understand and organize the world around us. The history of labeling is intertwined with the development of writing, printing, and ultimately, the mass production of goods. Early labels were often handwritten or woodblock printed, reflecting the limited technology of the time. As printing technology advanced, labels became more elaborate and visually appealing, incorporating intricate designs and vibrant colors. The invention of the adhesive label in the 19th century revolutionized the industry, making it easier and more efficient to label products and containers.
But beyond the practical function of identifying and organizing, labels also carry a certain mystique. They can evoke feelings of nostalgia, authenticity, and even luxury. Think about the vintage labels on antique bottles and jars, or the meticulously crafted labels on artisanal food products. These labels tell a story, conveying a sense of history, tradition, and quality. In some cultures, labels are even believed to possess magical properties, capable of protecting the contents they adorn or warding off evil spirits. While these beliefs may seem far-fetched, they highlight the enduring power of labels to influence our perceptions and shape our experiences. Whether it's a simple handwritten tag or a sophisticated, digitally printed design, every label carries a message, both practical and symbolic. It's a testament to our innate desire to understand, organize, and ultimately, make sense of the world around us.
Unveiling the Hidden Secrets of Effective Labeling
Effective labeling goes beyond simply slapping a name onto an object. It's about creating a system that is clear, consistent, and easily maintainable. One of the hidden secrets of effective labeling is to consider the context in which the label will be used. Will it be exposed to moisture, sunlight, or extreme temperatures? Will it need to be easily removable, or is a more permanent solution required? The answers to these questions will influence your choice of materials, adhesives, and printing methods. Another often overlooked aspect of labeling is the importance of consistency. Using the same font, size, and color scheme across all your labels will create a cohesive and professional look.
Consider using a simple numbering system or color-coding scheme to further enhance organization. For example, you could assign a different color to each category of items (e.g., blue for clothing, green for kitchen supplies, red for cleaning products). This will allow you to quickly identify items at a glance, even if the labels are not immediately visible. Finally, remember that labeling is an ongoing process. As your needs change, so too should your labels. Regularly review your labeling system and make adjustments as needed. Don't be afraid to experiment with different techniques and materials to find what works best for you. With a little planning and attention to detail, you can create a labeling system that is both functional and visually appealing, helping you to stay organized and efficient in all aspects of your life. It's not just about putting a name on something; it's about creating a system that works for you and enhances your overall organization.
Recommended Tools and Materials
While you don't need a label maker, having a few key tools and materials on hand will definitely make the process easier and more enjoyable. High-quality pens are a must for handwritten labels. Look for pens that are waterproof, fade-resistant, and have a comfortable grip. Sharpies are a classic choice, but there are many other excellent options available, such as gel pens, calligraphy markers, and even paint pens. For printable labels, you'll need a printer, of course, as well as label paper. There are many different types of label paper available, including adhesive labels, waterproof labels, and even printable fabric labels.
Consider investing in a good pair of scissors or a craft knife for cutting out your labels. A ruler or straight edge will also come in handy for ensuring clean and precise cuts. And don't forget about adhesives! Glue sticks, double-sided tape, and even masking tape can be used to attach your labels to various surfaces. For a more professional look, consider using a laminator to protect your labels from moisture and wear. Laminating sheets are relatively inexpensive and easy to use, and they can significantly extend the lifespan of your labels. Finally, gather a variety of decorative elements, such as washi tape, stickers, stamps, and stencils, to add a personal touch to your labels. With the right tools and materials, you can transform even the simplest label into a work of art.
Beyond the Basics: Advanced Labeling Techniques
Once you've mastered the basic techniques of making labels without a label maker, you can start exploring more advanced methods. One popular technique is to use stencils to create custom designs and patterns on your labels. Stencils can be purchased at most craft stores, or you can even create your own using cardstock or acetate. Simply trace the design onto your label and then fill it in with paint, markers, or even glitter. Another advanced technique is to use heat transfer vinyl (HTV) to create labels that can be ironed onto fabric. HTV is a thin, flexible material that can be cut using a cutting machine and then applied to fabric using a heat press or iron. This is a great way to label clothing, bags, and other fabric items.
For a more rustic look, consider using wood burning to create labels on wooden surfaces. Wood burning tools are relatively inexpensive and easy to use, and they can create beautiful and unique designs. Simply trace your design onto the wood and then use the wood burning tool to burn the design into the surface. Finally, don't be afraid to experiment with different materials and techniques to create truly unique and personalized labels. You could use leather, metal, or even recycled materials to create labels that reflect your personal style and values. The possibilities are endless! The key is to be creative, resourceful, and willing to try new things. With a little practice, you can create labels that are not only functional but also beautiful and inspiring.
Essential Tips for Long-Lasting Labels
Creating labels is only half the battle. To ensure your labels stay put and remain legible for a long time, consider these essential tips. Before applying any label, make sure the surface is clean and dry. Wipe down the area with a damp cloth and allow it to dry completely. This will ensure a strong bond between the label and the surface. When using adhesive labels, apply even pressure to ensure a secure attachment. Start from the center of the label and work your way outwards, smoothing out any air bubbles or wrinkles. For handwritten labels, choose pens that are waterproof and fade-resistant.
Avoid using regular ballpoint pens, as the ink can easily smear or fade over time. If you're using printable labels, consider laminating them to protect them from moisture and wear. Laminating sheets are relatively inexpensive and easy to use, and they can significantly extend the lifespan of your labels. When labeling items that will be exposed to extreme temperatures or harsh chemicals, choose labels that are specifically designed for those conditions. There are many different types of labels available, including waterproof labels, chemical-resistant labels, and heat-resistant labels. Regularly check your labels to ensure they are still securely attached and legible. If you notice any damage or wear, replace the label immediately. By following these simple tips, you can ensure that your labels stay put and remain legible for years to come, keeping your home and office organized and efficient.
Choosing the Right Adhesive
The adhesive you choose is crucial for the longevity and effectiveness of your labels. Different surfaces require different types of adhesives. For smooth, non-porous surfaces like glass or plastic, a strong, permanent adhesive is ideal. However, for more delicate surfaces like paper or fabric, a removable or repositionable adhesive is a better choice. Removable adhesives allow you to easily remove the label without leaving any residue behind, while repositionable adhesives allow you to adjust the placement of the label multiple times before it sets permanently. When choosing an adhesive, consider the environment in which the label will be used.
Will it be exposed to moisture, heat, or chemicals? If so, you'll need to choose an adhesive that is specifically designed to withstand those conditions. There are many different types of adhesives available, including water-based adhesives, solvent-based adhesives, and hot-melt adhesives. Water-based adhesives are environmentally friendly and easy to clean up, but they may not be as strong or durable as solvent-based adhesives. Solvent-based adhesives are more resistant to moisture and chemicals, but they can be harmful to the environment and require special handling. Hot-melt adhesives are very strong and durable, but they require a special applicator and can be difficult to remove. Experiment with different types of adhesives to find the one that works best for your needs. Consider testing the adhesive on a small, inconspicuous area of the surface before applying it to the entire label. This will help you to ensure that the adhesive is compatible with the surface and will not cause any damage.
Fun Facts About Labels
Did you know that the first adhesive labels were actually invented by accident? In the 1830s, a pharmacist named R. Stanton Avery was experimenting with different types of glue when he accidentally created a self-adhesive label. He quickly realized the potential of his invention and went on to found the Avery Dennison Corporation, which is now one of the world's largest manufacturers of labels. Another fun fact is that the design of a label can actually influence our perception of the product it's attached to. Studies have shown that consumers are more likely to perceive a product as being high-quality if it has a well-designed label. This is why companies invest so much time and money in creating visually appealing and informative labels.
Labels are also used in a variety of unexpected ways. For example, scientists use labels to track the movement of animals, while archaeologists use labels to identify and categorize artifacts. Labels are even used in the art world, with some artists creating entire works of art using labels as their primary medium. The world of labels is full of surprises! From their humble beginnings as a simple way to identify and organize items, labels have evolved into a powerful tool that can be used to inform, persuade, and even entertain. So, the next time you see a label, take a moment to appreciate the ingenuity and creativity that went into its design. You might be surprised at what you discover.
Step-by-Step Guide to Creating Customized Labels
Let's dive into a step-by-step guide on how to craft those labels without relying on a label maker. First, gather your supplies: paper (adhesive or regular), scissors, pens or markers, a ruler, and any decorative elements you desire. If you're opting for printable labels, fire up your computer and choose a template from online resources or create your own using word processing software. Next, measure the area where you'll be applying the label. This will determine the size of your label. Cut the paper to the desired size, leaving a little extra room for trimming if needed. If you're using regular paper, apply adhesive to the back of the label using a glue stick or double-sided tape.
Now, the fun part: design your label! If you're handwriting, take your time and use neat, legible lettering. Consider adding decorative elements like borders, illustrations, or colorful accents. If you're printing, customize the template with your desired text, fonts, and images. Once you're satisfied with your design, print it out onto your chosen paper. Carefully cut out the label using scissors or a craft knife. If you're using adhesive paper, simply peel off the backing and apply the label to the desired surface. If you're using regular paper, apply adhesive to the back of the label and carefully position it on the surface. Press firmly to ensure a secure attachment, smoothing out any air bubbles or wrinkles. Voila! You've created a customized label without a label maker. Repeat the process for all your labeling needs, and enjoy the satisfaction of an organized and personalized space.
What if Your Labels Need to Withstand Water or Heat?
Life happens, and sometimes your labels need to be tougher than average. What if they're going on items that will be frequently exposed to water, like shampoo bottles in the shower, or items that might get hot, like jars of homemade preserves? Don't worry, there are solutions! For water resistance, consider using waterproof label paper, which is specifically designed to repel water and prevent ink from smearing. You can also laminate your labels after printing or handwriting them. Laminating sheets create a protective barrier that shields the label from moisture and wear. If you don't have a laminator, you can also use clear packing tape to cover the label.
For heat resistance, choose labels that are made from heat-resistant materials, such as vinyl or polyester. These materials can withstand high temperatures without melting or warping. When printing labels that will be exposed to heat, use a laser printer, as the toner is more heat-resistant than the ink used in inkjet printers. Avoid using labels that are made from paper, as they can easily curl or discolor when exposed to heat. Additionally, think about the adhesive. Some adhesives soften or melt under heat, causing the label to detach. High-temperature adhesives are available and should be selected when needed. With a little extra care and attention to detail, you can create labels that can withstand even the most challenging conditions, ensuring that your items stay organized and properly labeled for years to come.
A Listicle of Creative Labeling Ideas
Need some inspiration? Here's a listicle of creative labeling ideas to get your organizational juices flowing: 1. Spice Rack Makeover: Use chalkboard labels to create a rustic and charming spice rack.
2. Pantry Perfection: Organize your pantry with uniform labels using printable templates and clear containers.
3. Toy Organization: Create fun and colorful labels for your kids' toy bins, using pictures or drawings to help them identify the contents.
4. Cable Management: Label your cables with color-coded labels to avoid confusion and tangles.
5. Homemade Gifts: Add a personal touch to homemade gifts with custom labels featuring your name and a heartfelt message.
6. Plant Markers: Create durable plant markers using wooden craft sticks and permanent markers.
7. Storage Bin Bliss: Label your storage bins with clear and concise labels, listing the contents and any important information.
8. Address Labels: Design personalized address labels for holiday cards and other correspondence.
9. Wine Labels: Create custom wine labels for your homemade wines, featuring your name, the year, and the grape varietal.
10. Bathroom Bliss: Organize your bathroom with stylish labels for your shampoo bottles, soap dispensers, and other toiletries. These are just a few ideas to get you started. The possibilities are endless! With a little creativity and resourcefulness, you can transform your home and office into an organized and aesthetically pleasing space, one label at a time.
Question and Answer About How to Make Labels Without a Label Maker
Q: What's the easiest way to make a label without a label maker?
A: The simplest method is to use masking tape and a permanent marker. Write the label on the tape and stick it to the desired item. It's quick, easy, and requires minimal supplies.
Q: How can I make my handwritten labels look more professional?
A: Use a ruler to draw straight lines, choose a clear and legible font, and consider using different colored pens for emphasis. You can also add decorative elements like borders or small illustrations.
Q: Can I print labels from my computer if I don't have label paper?
A: Yes! Print your labels on regular paper and then use glue or tape to attach them to your items. You can also use sticker paper, which is available at most office supply stores.
Q: How do I make labels that are waterproof?
A: Use waterproof label paper and a laser printer. You can also laminate your labels after printing or handwriting them to protect them from moisture.
Conclusion of How to Make Labels Without a Label Maker
Creating labels without a label maker is not only possible but can also be a fun and creative endeavor. By utilizing readily available household items, printable templates, and a dash of imagination, you can achieve organized bliss without breaking the bank. Whether you prefer the charm of handwritten labels or the precision of printable designs, the methods outlined in this guide offer a versatile toolkit for all your labeling needs. So, embrace the challenge, unleash your creativity, and transform your home and office into an organized oasis, one label at a time!